Record & capture
Recording a meeting
updated
Start and stop from Obsidian or from the Oris app, watch the stages while the note is made, and let a forgotten recording stop itself.
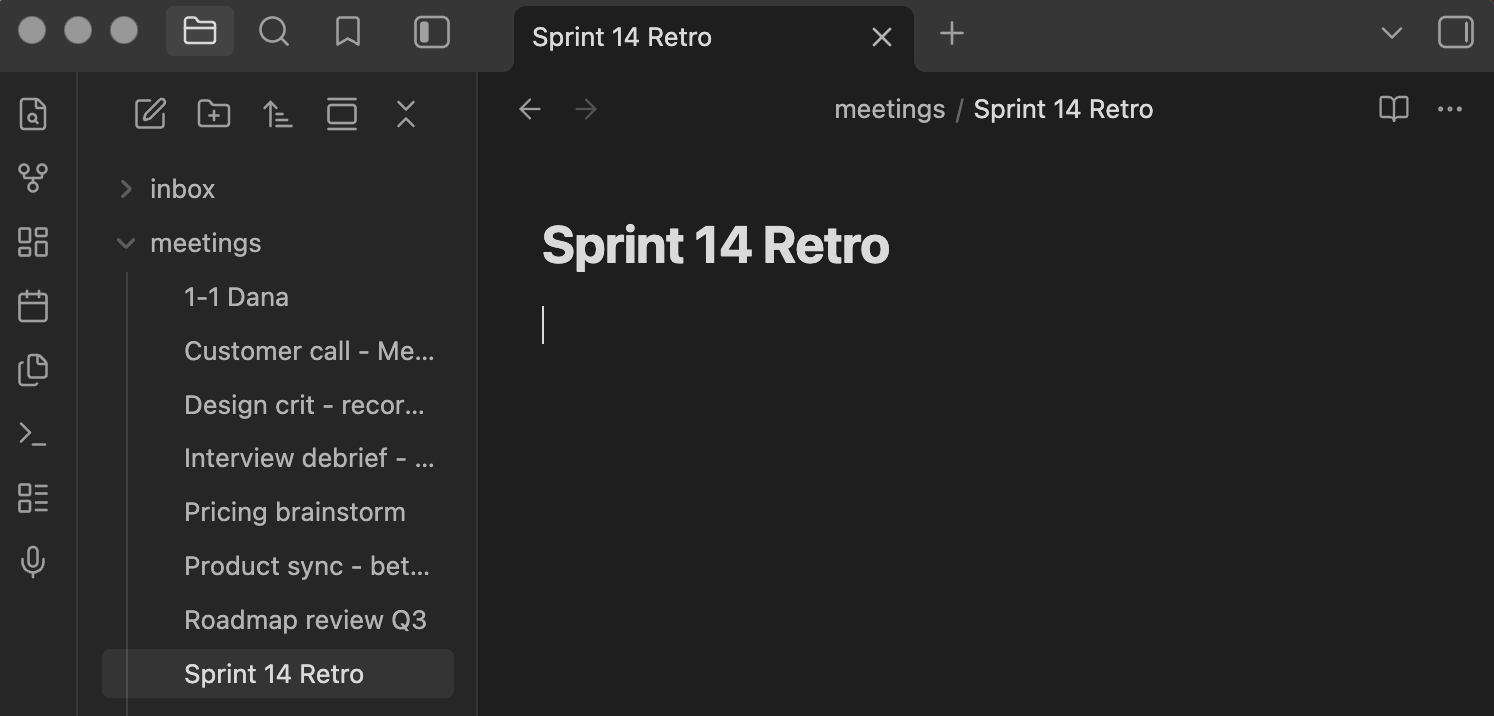
The Obsidian plugin puts a mic ribbon icon in the left sidebar. Click it to start, click it again to stop. While a recording is running the icon turns into a red record dot, and hovering it swaps in a stop square so it’s obvious what the next click does.
The same three actions sit in the command palette: Oris: Start recording, Oris: Stop recording, and Oris: Toggle recording. Assign a keyboard shortcut to any of them under Settings → Hotkeys → search “oris”. Oris ships with no default chord, on the grounds that whatever you have already bound is more important than whatever we would have picked.
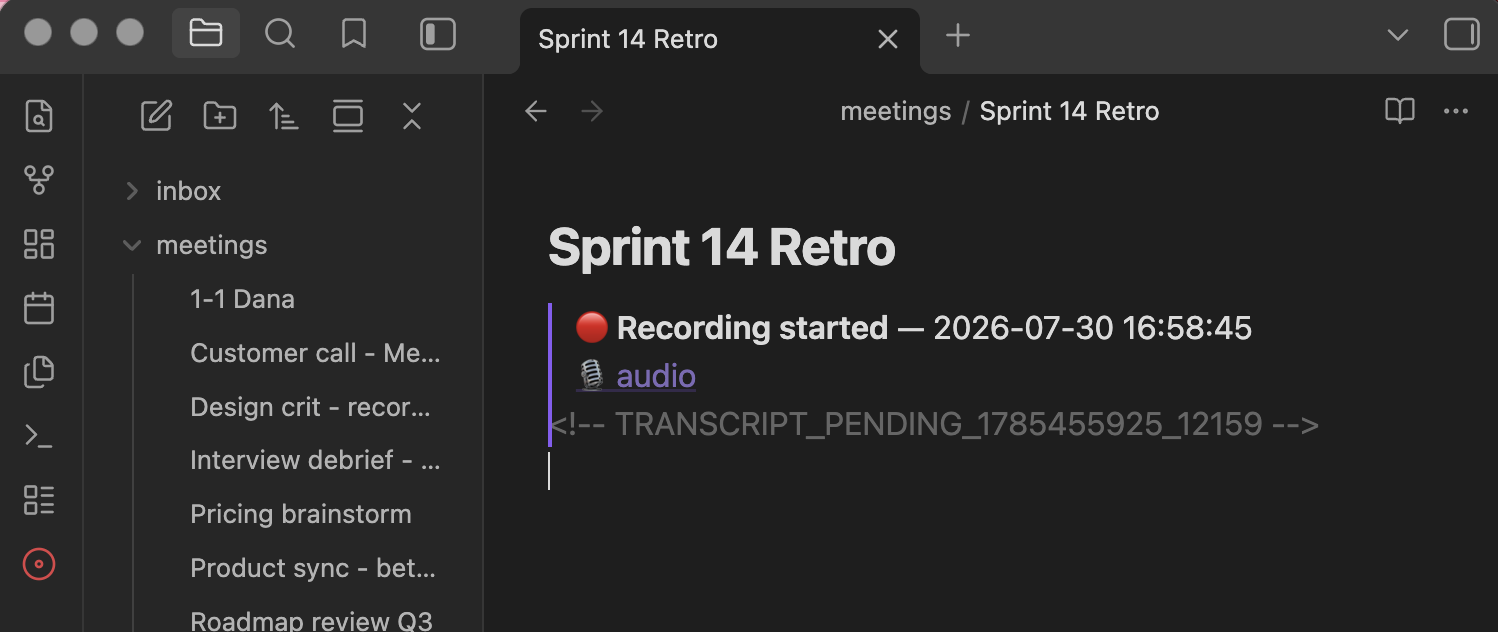
Recording starts where your cursor is, in the note you have open, so the transcript comes back to the spot you were writing in. See recording into an open note for what that means if you move around afterwards.
The Oris app can start a recording too, so Obsidian doesn’t have to be open (or installed) to capture a meeting. It’s the same single recording underneath: start in either place, stop in either place. See recording from the Oris app.
Pro · coming One more thing about this is still coming to Oris Pro: the transcript building while the conversation happens rather than after you stop. Oris noticing a meeting and offering to record it has landed, as Detect meetings.
From the Oris app
Obsidian is the richest way to use Oris, but it is no longer the only way to start a meeting. The record button is the last item in the app’s left-hand rail, pinned to the bottom under the seven sections and above the search field, so it is in reach from whichever section you happen to be looking at. (Between it and the sections sits the import target, for a recording or transcript that already exists.) It carries no words and sits in no box — it is a record circle, about twice the size of a rail row’s icon, that becomes a filled red stop button while a recording runs. Click it and the meeting is being captured, exactly as if you’d clicked the ribbon icon in Obsidian. Nothing else needs to be installed or open: on a Mac with no Obsidian at all, this button plus a Markdown-folder or Apple Notes destination is the complete workflow.
While a recording runs the button turns red and a ring around the stop square breathes gently, so one glance at the window tells you the microphone is live. (The ring holds still if you have Reduce motion switched on in macOS’s accessibility settings.)
Directly beneath the button, centred on it, a single line narrates the recording. At rest it simply reads Start recording — a plain nudge in secondary type, since a bare circle doesn’t always read as a button on its own. Where your notes will land is shown in full under General → Destination rather than repeated here; what this line is for is the things that change. If that destination has a problem (a vault or folder that moved, say) it takes over that same line with Check destination instead, before you record rather than after a meeting has nowhere to go, and opens the exact problem with a way through to General to fix it.
During and after the meeting
Once recording, the elapsed time counts up directly under the button, so the two read as one control; stopping is the same button, now a stop square. The button only records: the moment you stop, it reads Start recording again, and the recording moves to its own row at the top of Recordings → Recent recordings and of See all recordings…. That row is where you watch the note being made. It reads Transcribing…, with a percentage that climbs as the engine works through a recording of two minutes or more, then Summarizing…, the same two stages the menu bar and the Obsidian status pill show. There is no third word: a model that has to warm up or download first simply sits under Transcribing… until real transcription begins. Until delivery names the note, a recording started from the app shows its audio file’s name, and the row renames itself once the note has one.
When the note is ready, that same row becomes the finished recording in the same place, with its green check and its Open note button: straight to the note in Obsidian for a vault note, in your default Markdown editor for a folder note, or in Notes for an Apple Notes delivery. A run that failed turns into a failed row, with its ✗ and Open log.
You don’t have to be on Recordings to know where things stand. The Recordings item in the rail carries one small icon at its end: an ember dot that pulses slowly while a recording is being processed, a green check once it’s done, and a warning triangle if it failed. With an Apple Notes destination, done means the note is in Notes, so the dot keeps pulsing until it gets there. The check and the triangle stay until you open Recordings. With several recordings at once, the dot wins over the triangle, and the triangle over the check. (The dot holds still with Reduce motion on.)
A recording that is still being made never gets in the next one’s way. The record button is ready again the moment you stop, so the next meeting is one click away even while the last one’s note is still being written: recordings queue up, each gets its own row with its own stage, and each note lands in its own place. If a recording can’t be started at all (microphone access turned off for Oris, say), the reason appears under the button rather than the click doing nothing.
Unlike the plugin flow, there’s no cursor and no open note here, so nothing is inserted anywhere while you record. The note is created when the recording finishes, named and placed by your destination’s settings; see Obsidian and Markdown for how that’s decided. In an Obsidian vault, standalone recordings land as new notes in your inbox folder.
If the summary fails on one of these recordings, everything you’d expect still works, and it works from the app: the transcript lands, the ⚠️ block goes where the summary would have, and the retry in Recordings → See all recordings… heals it, patching the note in place on a file destination or delivering the fresh summary as its own note beside the original on Apple Notes. See when a summary fails.
One recording, every surface
There is only ever one recording at a time, and every surface sees the same one. A meeting you started in Obsidian shows up in the app — the rail’s button is a red stop square — and a meeting you started in the app shows in Obsidian’s status bar the same way. The app is a window onto the recording, not a separate recorder.
Closing the Oris window or pressing ⌘Q hides Oris rather than quitting it: it keeps running in the menu bar, and a recording in progress carries on with nothing asked — stop it from the menu bar icon, from Obsidian, or by bringing the window back. Quit Oris from the menu bar icon is what actually quits, and it stops a running recording first, then quits both the icon and the app; Quit on the Dock tile is the same full quit. If the Dock’s Quit, or logging out, catches a recording running, it asks first: the recorder is a separate process and keeps capturing if the app quits, and the dialog says exactly that, offering Stop recording or Keep recording.
Watching it work
While a recording is active, the plugin shows ● recording 02:14 in Obsidian’s bottom-right status bar. Click it to stop. The pill re-checks every second that the recording is genuinely still running, so it can’t sit there showing a recording that has already stopped.

After you stop, the pill keeps you posted through the work that happens next. It shows ✎ transcribing 42% — the percentage climbing as the engine works through the recording — and then ✍ summarizing… while the summary runs. Those are the only two words it uses: a transcription model that has to warm up or download first shows as ✎ transcribing… without a number until real transcription begins, and a larger summarization model being pulled down for a long meeting sits under ✍ summarizing… (a notification tells you about that download). The label clears on its own the moment your note lands. See preparing the model for why that first wait can be long.
Imports get their own state: ⬆ importing… while a transcript or audio file is being brought in.
The pill lives in Obsidian, so you see it when Obsidian is in front of you.
The menu bar
The Oris mark in your menu bar is the same recording, visible from any app. It stays the same size and changes only its colour: system-tinted while idle, red while recording, ember while your note is being made. Click it and the top line of the menu says which — Idle, Recording · 02:14, or the stage in progress — above Start recording and Stop recording.
If you’d like the elapsed time beside the icon, turn on Show recording timer in that menu. It’s off by default, so the icon never nudges its neighbours and a shared screen doesn’t show a running timer.
If the icon isn’t in your menu bar at all, it is usually there and out of sight: a crowded bar on a Mac with a notch quietly clips whatever no longer fits, and a menu bar manager like Bartender or Ice hides new items by default. Choose Help → Show menu bar icon to relaunch it — which is also the fix if it genuinely didn’t start — and a line under Setup on the General section tells you whether it’s running or why it couldn’t.
A hotkey for starting
Starting from the menu bar has a keyboard twin. On the General section of the Oris app, under Meetings, the Recording hotkey field takes a global combination: click it, press the keys you want, and from then on that combination starts a recording from whatever app you happen to be in — the same recording the menu bar’s Start recording makes, which means it uses your default template (or a destination’s own, if you have given one an override). Press it again while that recording is running and it stops — the same press-to-start, press-again-to-stop rhythm Quick Note has. Delete clears it, Escape cancels, and a combination already spoken for elsewhere in Oris is refused rather than quietly taking the other one’s place.
It names no template, which is the point: it resolves the way a click on Start recording does — the template you gave that destination, then your default, then the standard summary — so it keeps being right when any of those change. Binding a hotkey to a particular template is the Pro half of this and lives on the template rows themselves; this one, which follows whatever you already record with, is not.
As with the Quick Note hotkey, macOS quietly owns a lot of combinations and doesn’t announce it when it does, so a hotkey that appears to do nothing is usually that rather than a bug, and a different combination is the fix.
Stopping itself
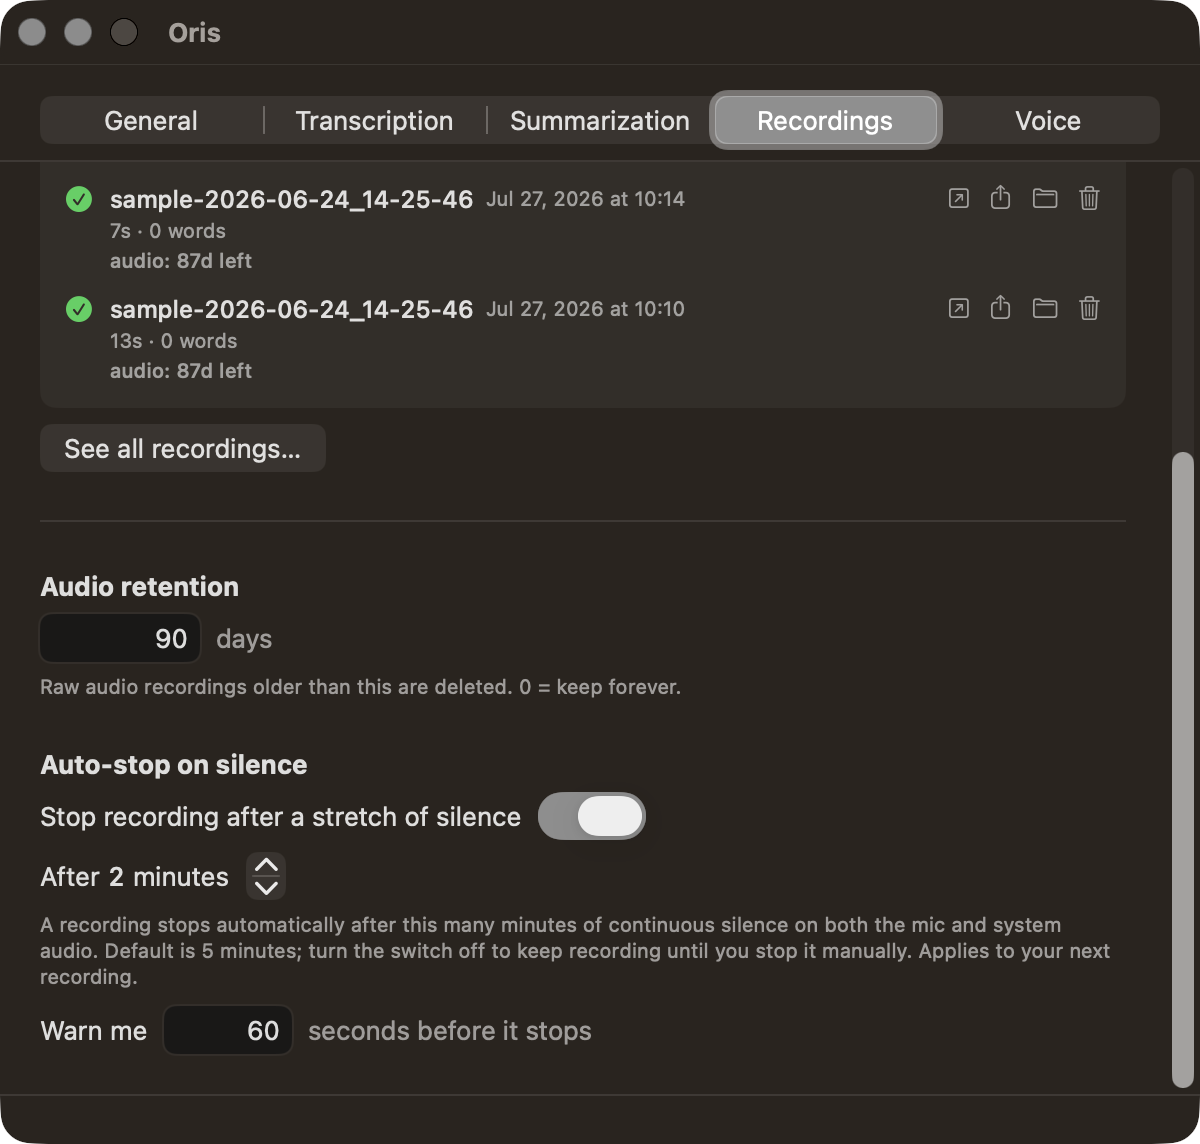
A recording you forget to stop doesn’t run all afternoon. When both your microphone and the call’s audio have been quiet for five minutes, Oris stops the recording itself and transcription runs as normal. A minute before that happens you get a notification telling you it’s about to, so a long thinking pause is easy to rescue: make any sound and the countdown resets.
Change it, or turn it off, under Settings → Recordings → Auto-stop on silence. There’s a switch, the number of minutes, and a Warn me … seconds before it stops field for the heads-up. Changes apply from your next recording. If that number would leave no real gap before the stop, Oris shortens it automatically rather than firing a warning with nothing left to warn about.
Sleeping your Mac mid-recording doesn’t count as silence. Oris recognizes the gap for what it is and starts the countdown fresh when you wake up, rather than stopping the recording the moment you open the lid.
How it works underneath
Switching output device in the middle of a recording
Changing where your Mac’s sound comes out in the middle of a meeting used to be the kind of thing that quietly cost you the other side of the conversation. Pair AirPods, plug in a USB audio interface, switch to an external display’s speakers, and the system-audio half of the recording is suddenly bound to a device that isn’t there any more.
Oris notices the switch and reconnects system-audio capture to the new device on its own, without stopping the session. No audio is lost across the change. From your perspective, the recording just keeps going.
Sample rates are re-read, not remembered
Reconnecting mid-recording raises a subtler question: the audio format of the system-audio stream can follow the new device. Switch from 48 kHz speakers to a 44.1 kHz interface and the samples arriving afterwards are 44.1 kHz. If Oris still believed 48 kHz, it would label them wrongly and resample by the wrong ratio. The result is audio that plays back roughly 9% fast, and a transcript made from a pitch-shifted recording.
So the format is read fresh rather than remembered. Oris re-reads it whenever reality can have moved: at the start of a recording, again after every device change, and again if the output device changes its own sample rate without the default device changing at all, which is what happens when you adjust the rate in Audio MIDI Setup, or an app like a DAW drives the device. A format that can’t be read, or that comes back nonsensical, is discarded in favour of the last known-good one rather than adopted.
One consequence is worth knowing about. macOS’s own audio encoder accepts sample rates only up to 48 kHz, so if your output device runs above that (a hi-res DAC at 96 kHz, or the headphone jack configured for 96 kHz in Audio MIDI Setup) the recording is encoded at 48 kHz rather than refusing to start. Nothing is lost that matters here: transcription downsamples to 16 kHz mono regardless.
Detect meetings
Pro Oris can notice that a meeting has started and offer to record it. Turn on Offer to record meetings under General → Meetings in the Oris app; it is off until you do, and the toggle needs Oris Pro.
With it on, Oris watches whether any microphone is in use, and which app is using it. Both are things macOS publishes about devices and processes; neither is the audio, and neither needs a new permission. Which microphone does not matter: a call on your MacBook’s built-in mic while a USB mic is your Mac’s default input is noticed all the same, and so is one on a headset you plugged in as the meeting started. It watches for conferencing apps opening too, so a call still gets noticed when something else was already using the mic. When something takes your microphone and it is not one of the things Oris knows is never a meeting, you get a notification: “Meeting started — record it?” Clicking it starts the recording exactly as the menu bar’s Start recording does, with your usual destination and template.
The recording begins when you click, and that is the point of the design: which meetings get recorded stays a decision you make one meeting at a time, which matters because recording-consent rules vary by where you and the other people are, and following them is yours.
Oris asks once per app rather than once per meeting. Whatever is holding your microphone gets one notification and then stays quiet for as long as it keeps holding, and something else taking your microphone gets its own — which is what keeps a real call from being missed because a different app touched the mic a minute earlier. An app that lets go of your microphone and takes it again asks again — so leaving a call and rejoining it gets you a fresh notification, the way it does in Notion — with one app never asking more than twice a minute: rejoin within half a minute of the last notification and the next one waits until that half-minute is up. Muting for more than a few seconds does release the microphone in most apps, so a long mute is one of the ways an extra notification can turn up; that is the accepted price of never missing a rejoin.
Detection is not a list of apps it has heard of. Zoom, Microsoft Teams and Webex are recognised by name, and so is anything else that takes your microphone — which is what makes a FaceTime call, or a meeting in a browser tab like Google Meet or a Zoom web client, count the same as a native client. The earlier version worked the other way round, and the list was the problem: macOS names the process holding a microphone rather than the app you clicked, so a FaceTime call arrived as a background service and a Meet call as one of Chrome’s helpers, and neither matched a list of app names.
Oris also stays quiet whenever it is already busy: while a recording is running, while one is starting, and while a quick note is being captured.
Your own voice work does not look like a meeting either. Dictating a message, taking a quick note, using Siri, Sound Recognition or a voice memo leaves detection quiet, even with Zoom or Teams sitting open in the background as they are all day for a lot of people. Where macOS will not tell Oris who holds the microphone — versions older than 14.2, and the occasional Mac where the check is unavailable — Oris falls back to the older app-name rule, which notices a native client and misses a browser call.
What Oris can see is who is holding the microphone, never why. A Zoom mic test, a green room before a call or a recorded voice message are all Zoom holding your microphone; a page running a microphone check is a browser holding it, exactly as a Google Meet call is; and a long take in an audio app it has never heard of looks the same from outside. So a notification you did not expect is possible. Ignore it and nothing happens — and because each notification belongs to the app that raised it, one you ignored does not use up the one a different app’s meeting would have got, and the same app gets a second one once it has let go of the mic and taken it again.
Turning the setting off removes the watcher. Oris asks for no new permission to do any of this; the banner uses the Notifications permission Oris already asks for.
Answering it with a template
The banner can also start the recording in a particular shape, so picking the note you want and saying yes are one gesture instead of two.
macOS shows nothing extra on the banner until you move the pointer over it — this is its own chrome, not something Oris can change — and hovering reveals an Options control. Opening it lists Start recording first, then up to three of your note templates in the order you arranged them. Pick one and the recording starts with that template applied; pick Start recording and it starts with your usual one, exactly as clicking the banner itself does.
Which templates appear is a list you already curate. They are the same ones the menu bar shows under Start recording ▸, in the same order, taken from the shortcuts you set up under Settings → Summaries → Note templates. So a person with twenty templates never sees twenty here: they choose once, and both surfaces follow. With none set up, the banner shows a single Start recording button and nothing else. (Detect meetings is part of Oris Pro and so are templates, so this banner is a Pro one either way — the single-button shape is what you get when your shortcut list is empty, not a free tier.)
Closing the banner is “no.” There is no separate No button; the ✕ is it, and nothing is remembered from it. Oris will still notice your next meeting, and dismissing a prompt never counts as an answer about anything but this one.
The prompt does not outlive the meeting
A notification normally sits in Notification Center until something clears it, which used to mean a prompt from this morning would still start a recording if you found it and clicked it in the afternoon — for a meeting that ended hours ago.
It no longer does. Once the app that raised the prompt has left your microphone alone for the couple of minutes after which Oris stops treating it as the same meeting, Oris takes the prompt back off the screen: the question was about a meeting that was happening, so it goes when the meeting does. A shorter gap — a mute, a screen share, a headset swap — leaves it up, and if the same app comes back and asks again, the newer notification replaces the older one rather than joining it. If Oris is not running to do any of that — you quit it with a prompt still up — the prompt stops working on its own a couple of hours after it appeared, and clicking it then starts nothing rather than starting a recording you did not want.
The templates on it are covered too, though slightly differently. A notification keeps whatever it was showing when it arrived, so a template you rename or delete afterwards is still listed on an old prompt — macOS gives Oris no way to change that. What Oris does control is what happens when you pick it: it checks the template is still the one you were shown, and if it isn’t, it starts nothing and tells you, rather than quietly recording in some other shape.